186
186
How to Add or Edit an Individual Within Check-In
Adding an Individual or Family
Note: To add or edit an individual or family you must use a Manned check-In station.
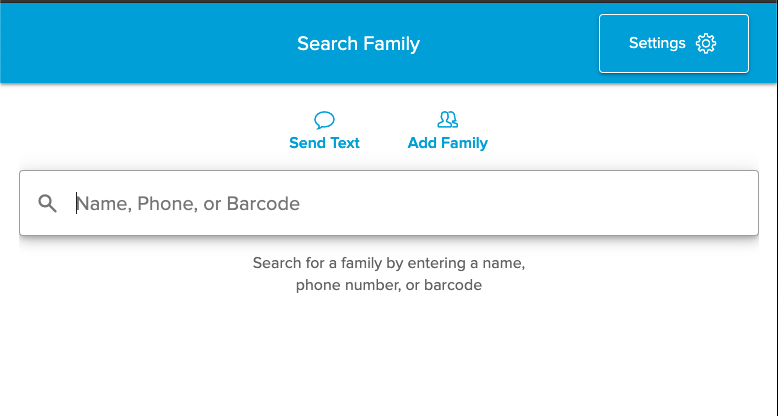
- Click on the Add Family button from the home screen of Check-in.
- Input the first and last name as well as any other appropriate fields.
- Should the system detect any duplicates a banner will appear across the bottom of the screen.
- Click on the banner to review potential duplicates.
- Click Save ✓.

Editing an Individual or Family
- Search for the family.
- Click on the Family Actions.
- Click Edit Family button.
- Then edit any necessary fields.

How to Remove an Individual From an Event
Last updated Apr 9, 2022
If an individual accidentally checks-in to an incorrect Event or decides to not attend the Event you can remove the individual from the Event to ensure accurate attendance records. If the individual has been checked into the Event for more than five minutes you can determine whether you would like to maintain the attendance, but remove them from being checked in.
Through Family Actions
- Search for the individual.
- Click on Family Actions and then Edit Check-in.
- Find the event and click REMOVE and REMOVE in the confirmation modal.
- Finish editing the Check-in for any additional individuals.

Through the Individual
- Search for the individual.
- Click on the individual to pull up the list of events.
- Click REMOVE and REMOVE in the confirmation modal to remove them from a specific event.

Checking In an Individual
Whether you are using a Self or Manned Check-In station, the steps are the same.
- Search for the individual(s) you would like to Check-In.
- Select row for their family.
- Select the appropriate events for the individual. If you’d like to check-in an individual(s) to more than one event, you will need to tap their name to select the first event, then tap their name again to select the second event.
- Suggested events rules:
- If the individual is only in one group, that event shows.
- If the individual belongs to multiple events, attendance history looks at the five most recent attendance and suggests the most commonly attended.
- In the result of a tie, the most recent event wins.
- If the person is not in a group with an event, the person will need to go to a manned station to check in.
- Serving assignments rule:
- If an individual is in a position with a status of Accepted, Pending, or Declined for the current day, then the serving assignment will appear in Check-In.
- Selecting more than one option:
- You may only check into a single event within a given time.
- You can check into both an event and a serving position, regardless of whether the times overlap or not.
- Ratio Hold:
- A Leader or Assistant Group Leader can check into to an event that shows under ratio hold and this will automatically adjust the ratio.
- Non-leaders cannot check into an event that is full or under ratio hold.
- Suggested events rules:
- Select Text Message Paging Recipients (if enabled):
- The individuals selected here will be able to receive text messages sent through the Check-In system.
- Complete Check-In by selecting the Check-In ✓ button.
- Appropriate labels will print within a few seconds (if enabled).
Manned Check-In Station
There are three ways a volunteer can search for someone at a Manned Check-In station:
- Name
- First Name
- Last Name
- First and Last Name
- Barcode
- Phone number
- 10-digit number that includes the area code.
- 7 digit number.
- The last 4 digits of the phone number.
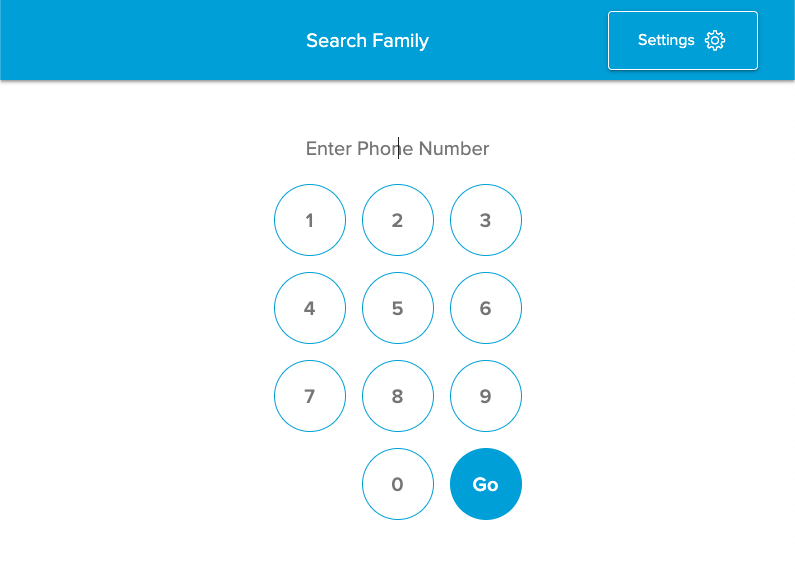
Self Check-In Station
Package Restriction: Self Check-In Stations are only available in the Complete Package of the software.
There are two ways an individual can search for themselves at a Self Check-In station:
- Phone number
- 10-digit number that includes the area code.
- 7 digit number.
- The last 4 digits of the phone number.
- Scan a barcode
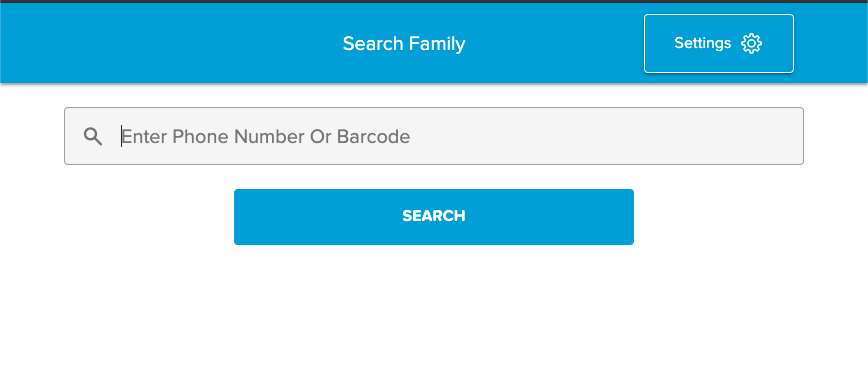
If your setup has a touchscreen-enabled your screen will entry fields will look like the following: